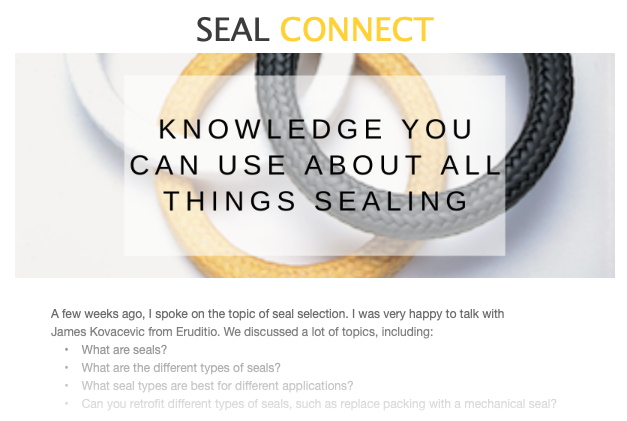
 SEAL CONNECT
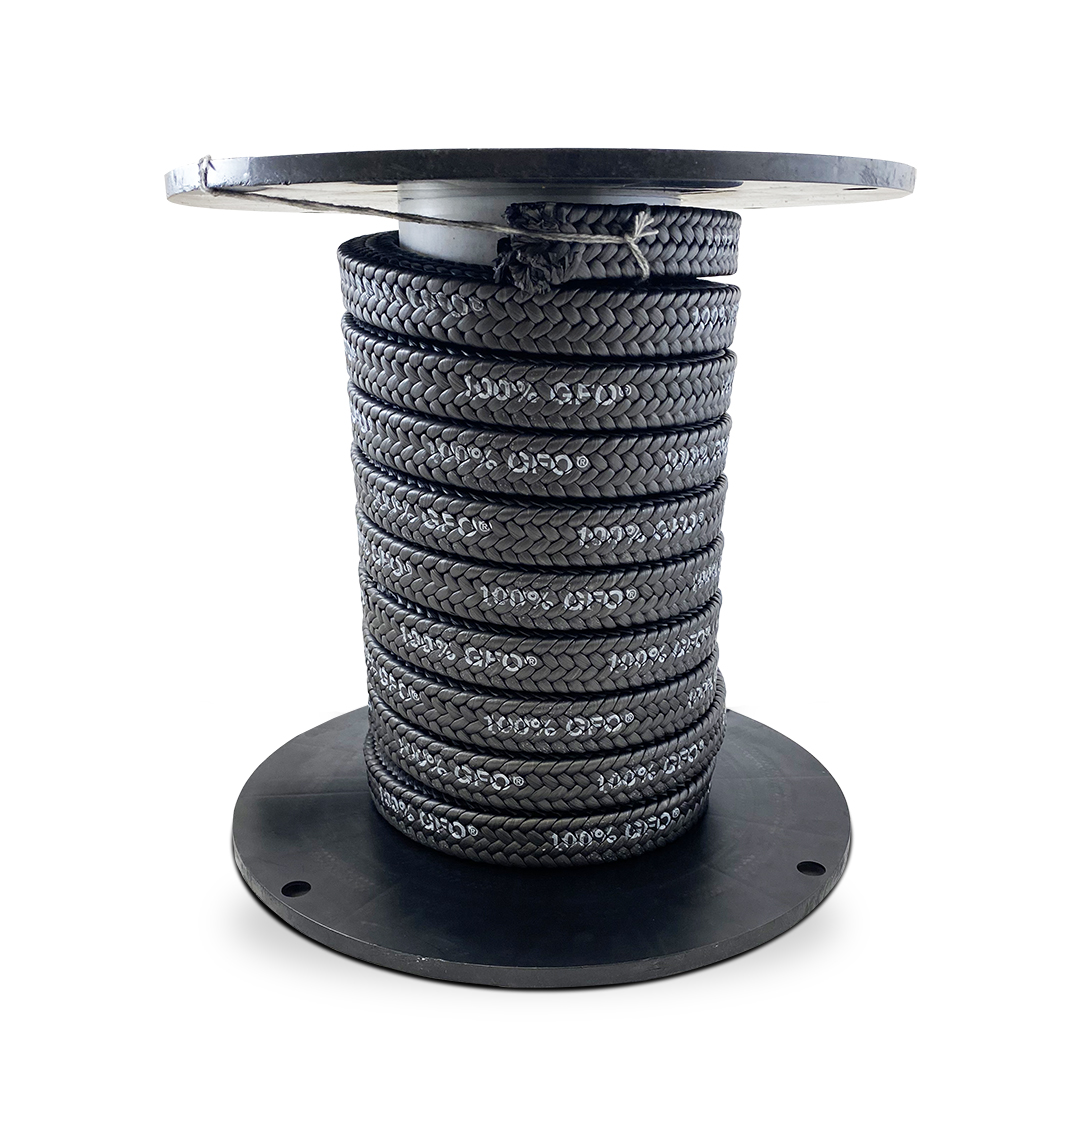 Dear Valued Distributors,
At SEPCO (Sealing Equipment Products Co., Inc.), we know that even the best sealing products depend on proper installation to perform as intended. Compression packing continues to be one of the most reliable and cost-effective sealing methods used in pumps, valves, and rotating equipment. When installed correctly, it provides long service life and dependable leakage control. When installed incorrectly, it can lead to premature failure, excessive leakage, and unnecessary returns.
That’s why installation technique matters.
Proper training also strengthens distributor relationships and ultimately leads to fewer service issues in the field.
This guide walks through a practical installation process based on proven industry methods. While specific materials—PTFE, graphite, aramid, or synthetic fibers—may vary, the core installation principles remain the same. When installed correctly, compression packing should typically operate at 8–12 drops per minute per inch of shaft diameter, providing adequate lubrication without unnecessary product loss.
Step 1: Prepare the Pump and Stuffing Box
Before starting, ensure the equipment is completely shut down, locked out, and tagged out. If the system operates under pressure or high temperature, allow it to cool and depressurize before proceeding.
Remove the existing packing using a packing extraction tool. Take care not to scratch or score the shaft or sleeve during removal.
Once the packing has been removed:
- Clean the stuffing box thoroughly
- Remove corrosion, debris, and old residue
- Inspect the shaft or sleeve surface
A wire brush or appropriate solvent can help restore a clean sealing surface.
Next, inspect the shaft for damage. Look for scoring, wear, or excessive runout. Shaft runout should generally be less than 0.002 inches TIR (Total Indicator Reading).
Finally, measure the stuffing box:
- Inside diameter (ID)
- Shaft outside diameter (OD)
- Depth of the stuffing box
Check the gland follower as well. It should move freely and apply even pressure across the packing set.
Common issues to watch for
Poor cleaning often leads to uneven packing seating and immediate leakage. If the shaft has deep grooves—typically greater than 0.010 inches—new packing will wear rapidly and fail prematurely.
Step 2: Select the Correct Packing Material
Choosing the right packing starts with the STAMPS criteria:
- Size – stuffing box dimensions
- Temperature – operating conditions
- Application – pump or valve; dynamic or static
- Media – chemical compatibility
- Pressure – system PSI
- Speed – shaft surface speed (SFPM)
Surface speed can be calculated using:
SFPM = (π × shaft diameter × RPM) / 12
Material selection depends heavily on the process conditions.
For example:
- Graphite-filled PTFE provides strong chemical resistance and performs well up to roughly 500°F and 1,500 PSI.
- Aramid fibers are often preferred for abrasive slurries and higher shaft speeds, sometimes exceeding 2,500 SFPM.
For guidance on material selection, consult SEPCO’s compression packing solutionsand compatibility resources for temperature limits, chemical resistance, and pH ranges. PTFE packings, for instance, often tolerate a 0–14 pH range, making them suitable for many chemical services. Food-grade applications may also require FDA-compliant materials.
Common mistakes
Using the wrong packing for the application can lead to rapid failure. Non-graphite packings used in high-temperature steam service, for example, often degrade quickly. Chemical incompatibility can also cause swelling, softening, or breakdown of the fibers.
Step 3: Measure and Cut the Packing Rings
To determine packing size, calculate the cross-section:
Packing Size = (Stuffing Box ID – Shaft OD) ÷ 2
Cut rings from packing coil using a sharp knife or packing cutter. Rings can be cut using either:
- Skive (45-degree diagonal) cuts, often preferred in higher pressure applications
- Butt (square) cuts
Wrap the packing around a mandrel that matches the shaft diameter, then cut to length. The ends should meet cleanly with no overlap and no visible gap. A tolerance of about ±1/16 inch is acceptable.
Pre-formed die-cut rings can also be used if available. For improved accuracy and consistency, SEPCO’s custom die-formed ring sets are available to match exact equipment dimensions.
Common mistakes
Never install packing by winding coil directly into the stuffing box. This creates spirals that unravel and leak. Rings that are cut too short leave gaps, while rings cut too long bunch up and generate excess heat.
Avoid using old packing rings as templates—they are usually compressed and distorted.
Step 4: Lubricate the Packing
Apply a compatible lubricant to the inner and outer surfaces of the rings.
Proper lubrication:
- Reduces friction during installation
- Helps prevent dry start-ups
- Allows smoother break-in
Examples include:
- Silicone-based lubricants for PTFE packing
- Graphite-based pastes for carbon or graphite packings
In water-based systems, approved break-in lubricants may be used to help saturate the fiber structure.
Common mistakes
Too much lubricant can cause packing slippage, while too little increases friction and heat. Always confirm lubricant compatibility with the process fluid.
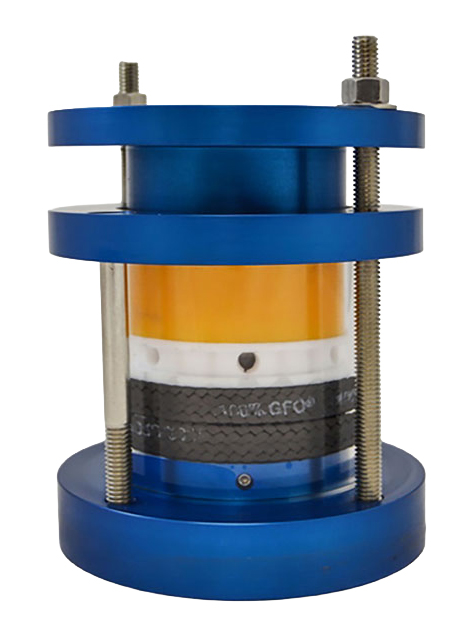
Step 5: Install the First Rings
Install packing rings one at a time, beginning at the bottom of the stuffing box.
Use a tamping tool or split bushing to seat each ring firmly. Avoid forcing rings with the gland follower.
Stagger the ring joints so they are not aligned. Typical positions may be:
- 12 o’clock
- 3 o’clock
- 6 o’clock
- 9 o’clock
Lightly compress the first rings using the gland follower—typically about ¼ turn on the bolts.
If the system uses a lantern ring, install the first few packing rings before positioning the lantern ring so it aligns with the flush port.
Common mistakes
Installing the entire set at once with the gland prevents the lower rings from seating properly. This can also misalign the lantern ring and block flush flow, leading to overheating or dry running.
Step 6: Install Remaining Rings and Lantern Ring
Continue installing rings one at a time, maintaining staggered joints and seating each ring before installing the next.
For applications requiring a lantern ring:
- Install it after the initial rings
- Align it with the flush port
- Ensure proper flush flow through the packing set
Typical pump packing sets include five to seven rings, depending on stuffing box depth.
Common mistakes
Aligning joints creates a direct leakage path. Incorrect lantern ring placement restricts flush flow and can lead to excessive temperatures.
 Step 7: Tighten the Gland Follower
Start by finger-tightening the gland bolts.
Then tighten them gradually using a cross or star pattern, tightening opposite bolts alternately to maintain even pressure.
An initial torque of 20–30 ft-lbs for ½-inch bolts is often sufficient during installation, though final torque will depend on packing type and application.
Common mistakes
Over-tightening compresses the packing excessively, increasing friction and heat. Uneven tightening can cock the gland follower and cause uneven wear.
Step 8: Break In the Packing
Start the pump at reduced speed while allowing flush water to flow freely.
During the break-in period:
- Initial leakage may be 20–60 drops per minute
- Run the equipment for 15–30 minutes
- Monitor temperature
Packing temperature should generally remain within 50°F above the process fluid temperature.
Common mistakes
Starting equipment dry or tightening the packing too soon often leads to glazing and rapid wear.
Step 9: Adjust for Proper Leakage
After break-in, gradually tighten the gland bolts in small increments—typically ⅛ to ¼ turns.
Allow 15–30 minutes between adjustments so the packing can stabilize.
The goal is to reach a steady leakage rate of approximately 8–12 drops per minute per inch of shaft diameter.
Check the adjustment again after 1–2 hours of operation.
Common mistakes
Trying to eliminate leakage completely usually results in overheating and packing failure.
Step 10: Monitor and Maintain
Routine inspection is essential for long packing life.
Check regularly for:
- Leakage rate
- Operating temperature
- Vibration levels
Flush systems should supply clean water at approximately 15–30 PSI above stuffing box pressure.
Packing should be replaced if leakage cannot be controlled or if the packing becomes hardened or extruded. For troubleshooting or application support, SEPCO’s engineering team can assist with proper material selection and system optimization.
Common mistakes
Ignoring routine maintenance allows packing to consolidate or corrode. Changes in operating conditions—such as new process media—may also require a different packing material.
Supporting Your Success
When installation practices improve, reliability improves as well. Many distributors report significant reductions in packing failures and product returns simply by standardizing installation procedures.
SEPCO supports our distributors with:
- Technical training and webinars
- Custom die-formed ring sets
- Application engineering support
If you have questions or would like training resources for your team or customers, contact SEPCO or connect with your representative.
We’re always here to help you keep equipment running and customers satisfied.
 Find Your Sealing Solution