 SEAL CONNECT
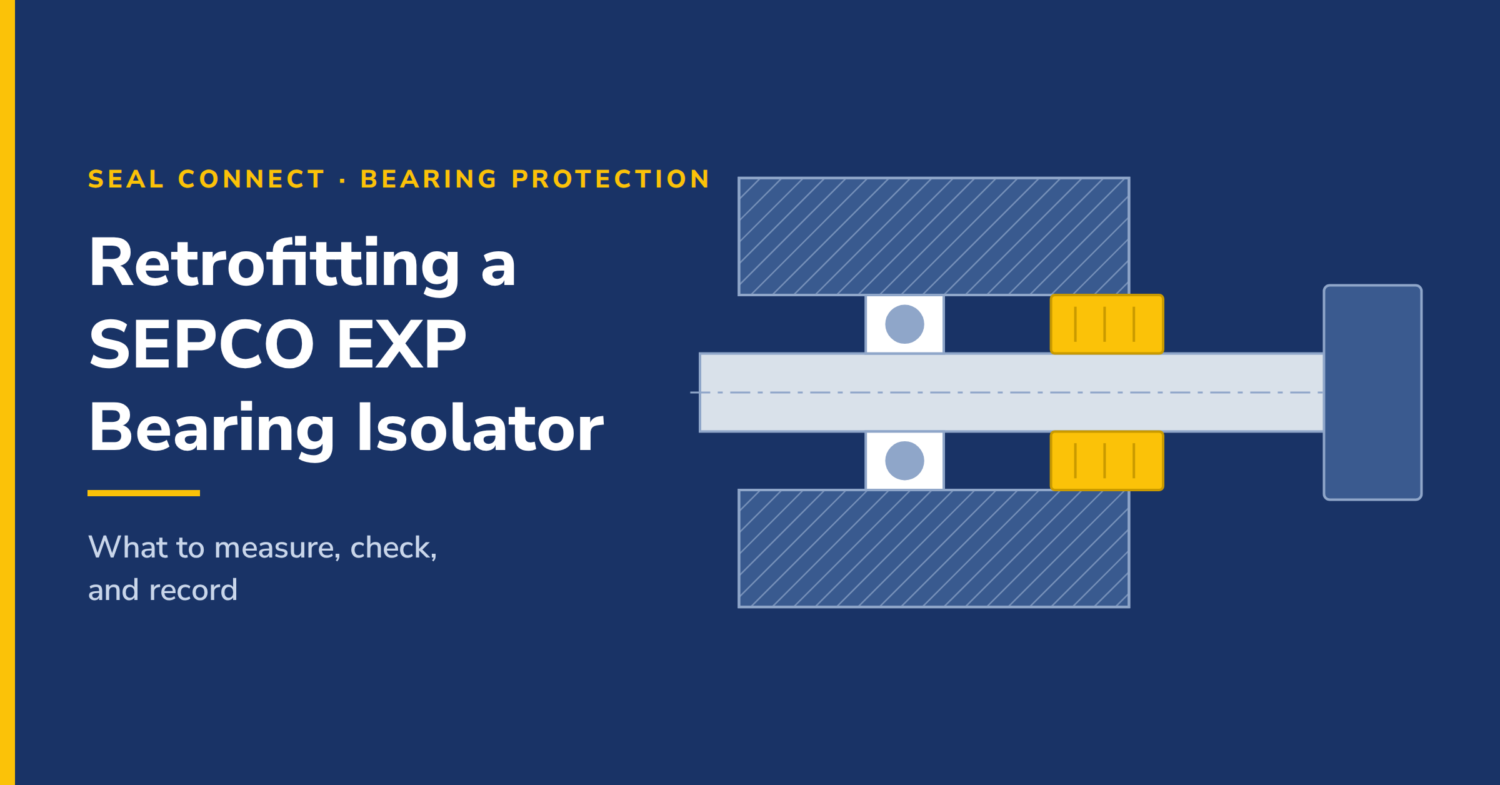
Swapping a lip seal for a SEPCO EXP takes about as long as the oil change you were going to do anyway. Whether it holds depends on what you measure before you order and what you check in the first few weeks of service. Most isolators that leak or fail early were sized from a catalog number, installed on a bore nobody measured, or run with the oil level set for the old seal.
This article covers the retrofit job. For how the EXP works and which version fits which equipment, see SEPCO EXP Bearing Isolator: How It Works and Where It Fits.
Read the failed bearing first
An isolator fixes contaminated oil. It does not fix load, alignment, or electrical problems, so confirm what killed the last bearing before you buy anything.
| What you find | Likely cause | Will an isolator help? |
|---|---|---|
| Rust staining, etched raceways, milky or cloudy oil | Water ingress or condensation | Yes, if the housing vent is addressed too |
| Dents and scoring from particles, gritty oil | Dust or process solids | Yes |
| Wear path offset or angled across the race | Misalignment, soft foot, pipe strain | No. Align first |
| Evenly spaced washboard marks (fluting) | Shaft current, often from a VFD | No. Ground the shaft |
| Blued races, darkened cage, varnished oil | Overheating, wrong viscosity, overfill | No. Fix lubrication |
Check the mechanical seal or packing too. If process fluid is running down the shaft into the housing, the isolator slows it down but the fix is at the stuffing box.
Measure before you order
Order from measurements, not from the OEM part number for the old lip seal. Housings get re-bored and shafts get sleeved over a pump’s life, and the paperwork rarely follows.
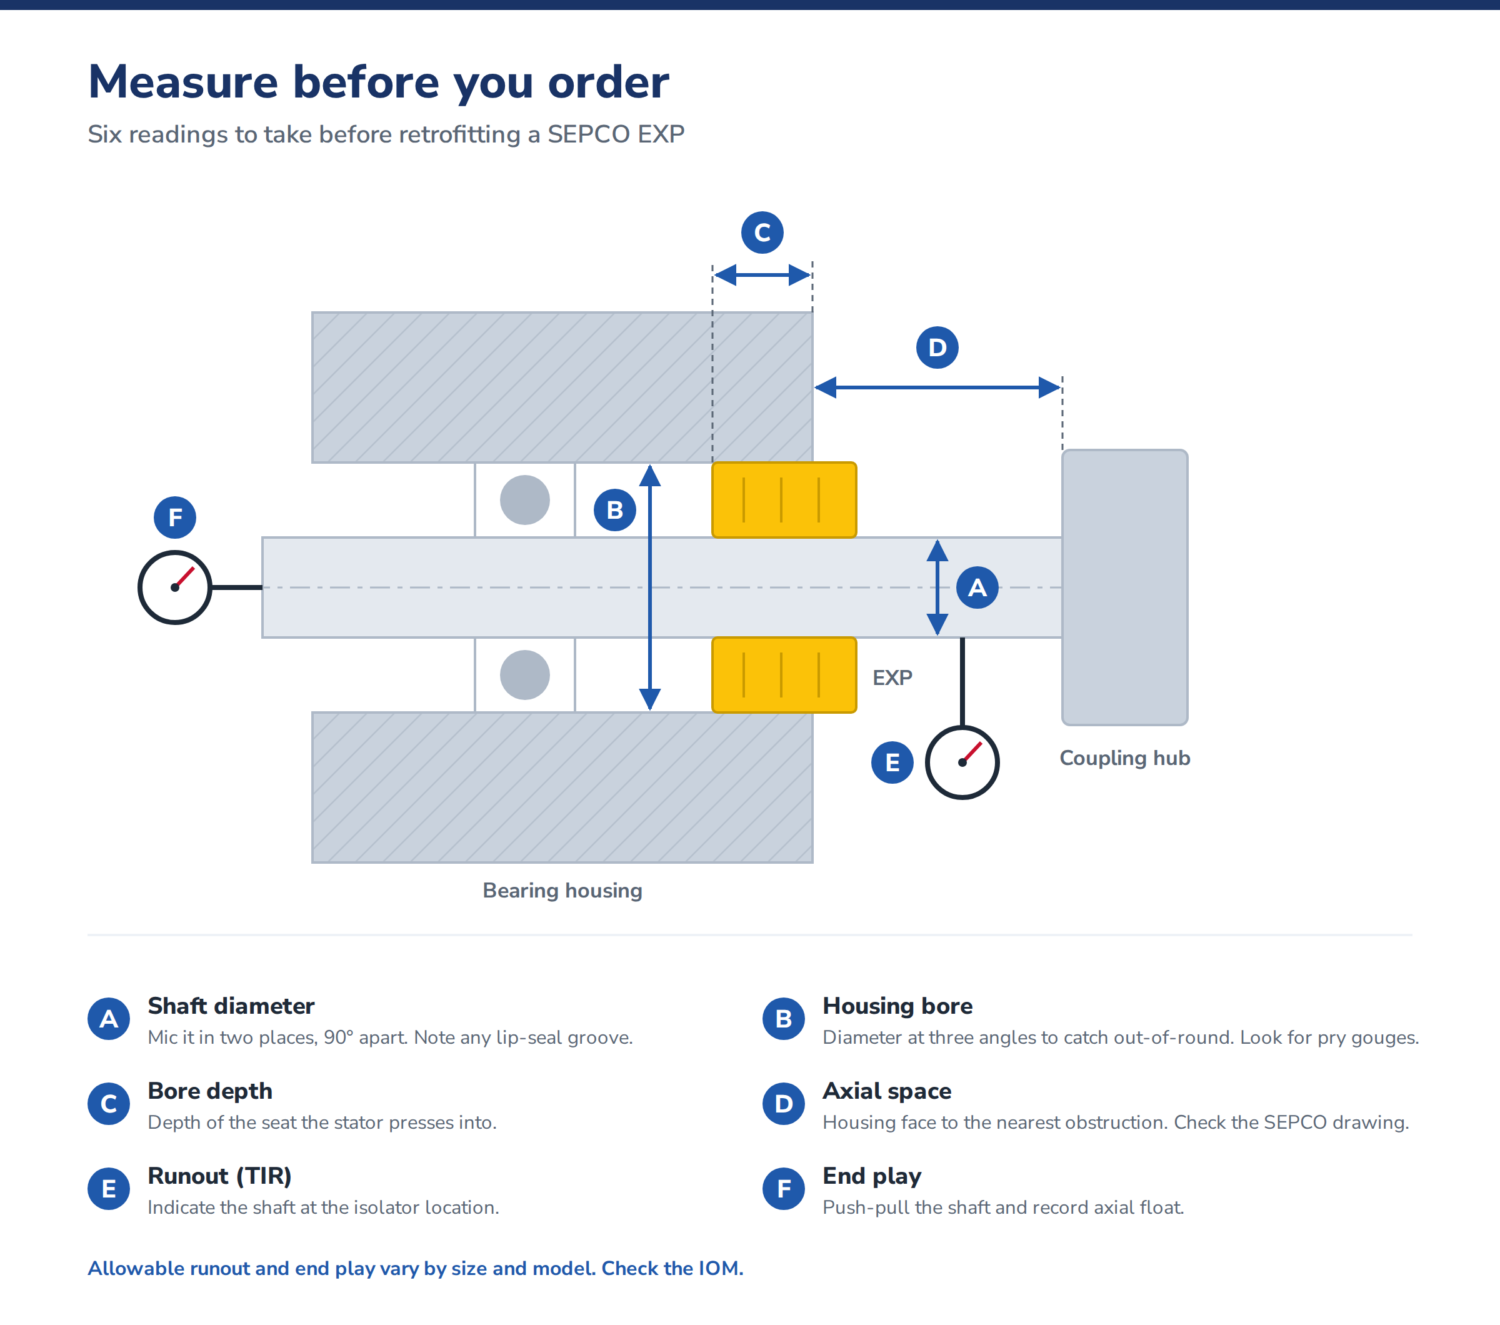
- Shaft diameter at the isolator location. Mic it at two points 90° apart. Note any groove from the old lip seal, its depth, and where it sits. The rotor seals on the shaft with an O-ring, so a groove under the O-ring seat needs a repair or sleeve. A groove outside it usually doesn’t.
- Housing bore. Measure diameter at three angles to check for out-of-round, and record bore depth. Look for gouges left by whoever pried the last seal out.
- Axial space. Measure from the housing face to the nearest obstruction: coupling hub, fan, impeller adapter. Isolators often extend past the housing face. Confirm the outboard dimension on the SEPCO drawing before you order.
- Runout and end play. Indicate the shaft at the isolator location and record TIR and axial float. Allowable limits vary by size and model; check them against the IOM.
- Speed and orientation. Record rpm and whether the shaft is horizontal or vertical. A vertical shaft changes the recommendation, so say so up front.
- Lubrication method. Oil bath, oil mist, or grease. Grease-packed housings and oil mist systems change the recommendation.
- Exposure. Washdown frequency, standing water at shutdown, dust load, and chemical exposure. These drive model and material selection.
Send that list to SEPCO at 205.403.7500 with the equipment make and model, and you get the right unit the first time.
Prep the shaft and housing
- Pull the lip seal without touching the bore. Use a seal puller or drill-and-screw method. A screwdriver levered against the bore leaves a gouge the new stator O-ring has to seal over.
- Dress burrs, not diameters. Knock down burrs and raised edges with fine emery cloth. Don’t polish the O-ring seat area undersize trying to clean up a groove.
- Cover every sharp edge. Tape keyways, threads, and shaft steps, or use an installation sleeve. A rotor O-ring cut on a keyway lets the rotor slip and oil leak along the shaft.
- Lubricate the O-rings. Use the housing oil or a lubricant the IOM approves. Dry O-rings roll and tear on the way in.
- Look at the vent. An open vent cap lets the housing pull humid air every time it cools down. An isolator on the shaft won’t stop condensation that comes in through the top of the housing.
Install
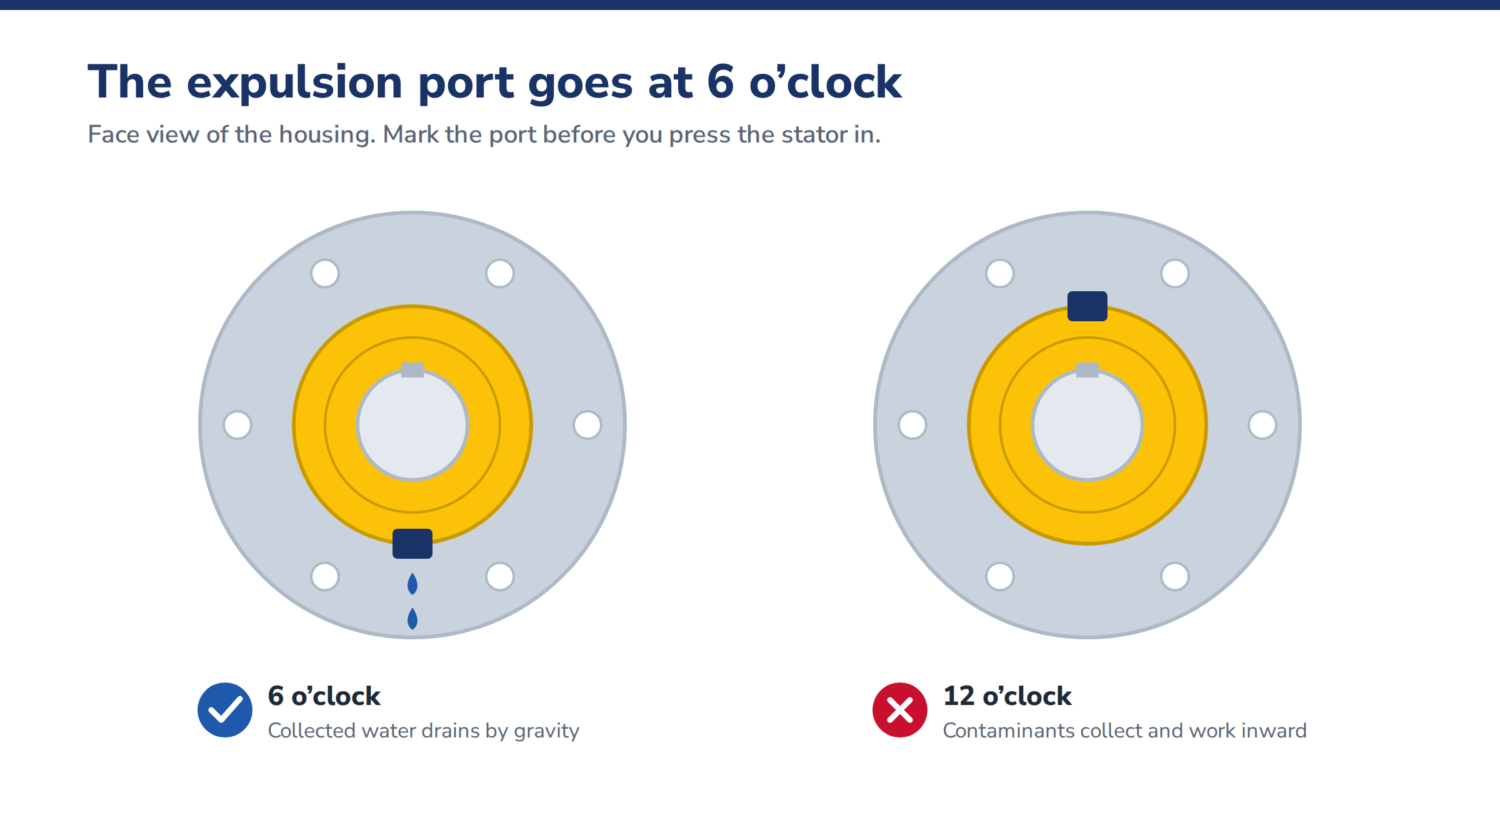
- Mark the expulsion port before you press. It goes at 6 o’clock. Installed at 12 o’clock, the unit can’t drain what it collects.
- Slide the unit on as shipped. Don’t separate the rotor and stator unless the IOM tells you to.
- Press the stator square. Use an arbor or driver that bears on the stator face only. Never hammer the rotor, and stop if the stator starts to cock in the bore.
- Turn the shaft by hand. It should rotate freely with no rub or drag. Rub means the unit is cocked or the shaft is outside runout limits.
- Set the oil level for the pump, not the old seal. Follow the pump manufacturer, typically the center of the bottom rolling element. Oil standing above the isolator’s drain floods it from the inside. Check that a constant-level oiler is set to the right reference line.
- Realign if you pulled the coupling. If the hub came off to get the isolator on, the old alignment is gone. Check it with a laser or dial indicators before startup.
First-run checks
A bad retrofit shows itself in the first few weeks. These checks catch it before it costs a bearing.
| When | Check | If it fails |
|---|---|---|
| First hour | Oil at the expulsion port | Level too high or port not at 6 o’clock. Shut down and correct |
| First hour | Oil weeping along the shaft | Cut rotor O-ring or undersize O-ring seat. Pull and inspect |
| At operating temperature | Recheck oil level | Reset the oiler. Levels read differently hot |
| First week | Record housing temperature and vibration | No failure condition. This is your baseline |
| After first washdown or 30 days | Oil sample for water (crackle test or Karl Fischer) | Water still getting in. Check the vent, the drain path, and the seal |
If a new install leaks, it almost always comes down to orientation, oil level, or a damaged O-ring. Check those three before you call it a bad isolator.
When to skip the retrofit
An EXP isn’t worth the money on clean, dry, light-duty equipment where lip seals already last as long as the bearings. Grease-packed housings with no purge path and housings that sit submerged at standstill need a conversation with SEPCO before you specify anything.
If you’re not sure the retrofit pays, send the measurements above and the last bearing failure report to SEPCO at 205.403.7500. We’ll tell you if a lip seal is the better call.
 Find Your Sealing Solution